It's been a while. I've been super busy working on thesis, none of which I'm able to show yet. So I'll share something I made a while back in September.
It's a material that tries to emulate the material layering system that is present in next generation engines.
You are able to control how rough a material is, which is controlled through gloss that is linked to blurring of a cubemap. So if you were to want something like chrome, the reflection would not be blurry and the specular highlight would be smaller. If you were going for something like iron, the reflection would get blurrier and the highlight would be wider.
Next, I had it so that you are able to plug in a RGB texture mask to determine the individual material definition parameters of each material at a per-pixel level. Alternatively I had a procedural mask system for simpler assets (as well as save on a texture look-up) where you could simply place your UVs to one of 4 sides a square to determine their material.
It's all tied together by plugging in your normal and AO maps straight out of Xnormal. Further material detention can be controlled through tillable normal maps and gloss maps for a bit more wear and tear.
It's a pretty huge material network even with nodes nested in material expressions. End result was a pretty good prototype for cutting texturing our of the pipeline and saving lots of time.
Monday, November 25, 2013
Monday, August 12, 2013
Summer at Epic Games
I guess it's been a while. So this summer I interned at Epic Games, and it was an absolutely amazing time and TONS were learned. So the only thing I can show right now is how I got in, and I've been given permission to show my art test. For anything else, it'll have to wait until Fortnite is released.
Friday, May 17, 2013
Livestream
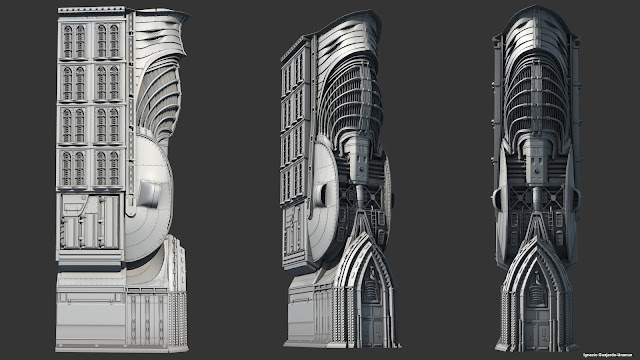
Will be livestreaming myself doing some high-poly modeling. Videos will remain up to show some of my process. First one up is nothing fancy, just modeling a modular chunk:
Link
Mainly hoping to look back on this and see how much of an improvement I've made in my modeling workflow.
Link
Mainly hoping to look back on this and see how much of an improvement I've made in my modeling workflow.
Saturday, May 4, 2013
2D Work
So this year I think my 2D skills have come a very long way and because of this my final 3D products have improved because there's less "designing on the fly". I am spending less time redoing things in 3D, which can get really expensive when you consider how much time it takes to redo in 3D. A thing I've stuck to throughout this year is to also do paint-overs of my pieces to test out things I might want to change in a piece or space. Try out different lighting situations or modeling challenges.
As a note, these pieces were done in very tight deadlines (as usual).
(preliminary concept for "Whale Town" that eventually evolved to its current state)
Sunday, March 24, 2013
Thursday, March 14, 2013
Saturday, March 9, 2013
Wednesday, March 6, 2013
Starcraft Environment Extended Edition
So last time I exported the movie cut too short and came out a tad darker than I'd like. Here's a better and longer export that showcases more areas of a lot of artistic and technical skill that went into making this. Now that this is no longer bothering me, back to work on many other things on my plate.
Depths - Starcraft Inspired - UDK [Extended] from Ignacio Guajardo on Vimeo.
Sunday, March 3, 2013
Whale Town [WIP]
Here's progress on an entry I am working on for Hasbro, the top image is the most recent update:
The pieces I created for the Edo lighthouse I will most likely re-use on the village with a few adjustments. It's all about the modularity when creating a town with the same architecture style. Also started detailing the whale. Several times I was tempted to use dynamesh because the topology was pushing me to bump up the division levels. I think I may push as far as I can with the current topology, as I am not sure how much re-topology is worth it for the time i'd have to give it. Currently an issue I am running in to, and will likely be even more of an issue later on is the amount of subtools I have. The light tower was built alone in another ztool, then used subtool-master to combine all the subtools and bring in to the master ztool. A bit of a hassle.
>What I think needs to happen next is to finnaly layout the town and polish its foundation: that placeholder rock needs attention, and also see what I can do about support for the propellers.
Thursday, February 14, 2013
Sunday, February 10, 2013
[WIP] Boss Character
Almost there. Plan is to be done by Thursday for a Hasbro workshop portfolio submission deadline.
Technique for the boots: use the "mask by smoothness" option under masking to have zbrush automatically mask edges of your mesh. You can control the thickness and falloff of the masking. Very useful for when you need to create some kind of border, saves time on manually having to go in and mask the edges out.
Technique for the pants: Stich alpha. Need two stitches instead? Tile the alpha under the alpha properties, no need to make a separate alpha.
Thursday, January 31, 2013
Boss Character - Skull [WIP]
Starting my boss character. I polished this skull from winter break to use as a base. No teeth yet. Good enough for blockout however.
Monday, January 28, 2013
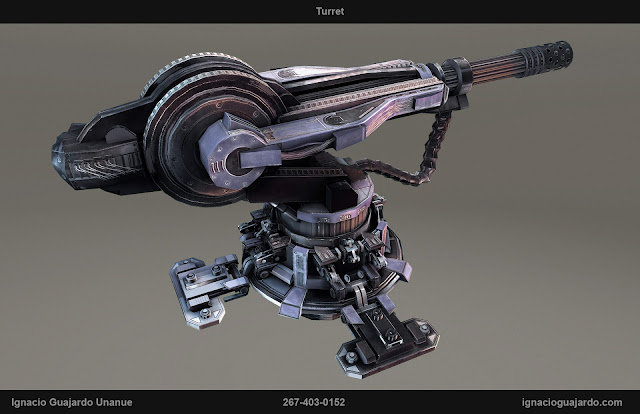
Turret [Near finished]
Here are the results!
Before this goes in my portfolio it still needs some work. The ammo belt needs re-worked, the legs at the bottom will get better support, and some areas came out too dark in the lighting. Also, I'd probably add in some serial part numbers, logo, and the wire that were baked into the flat surface of the turret at the top, will instead be a mesh like in the back.
Wednesday, January 23, 2013
Turret [WIP - 2]
Baked normals and NDO2 details. Now moving on to texturing, so I made a color sketch to pre-visualize it. Might end up going with this color scheme:
Friday, January 18, 2013
Turret [WIP]
AO Render w/ Renderman. I thought I was finished earlier but went back in and re-worked the base of the turret. Additional normal detail will be added through NDO2. Also, speaking of UV's, you know how it's usually bad to have some shells diagonal? Well, with Nightshade UV editor, at the press of a button you can automatically click on a shell and straighten it. It's a huge time saver for hard surface UVing.
Subscribe to:
Comments (Atom)


